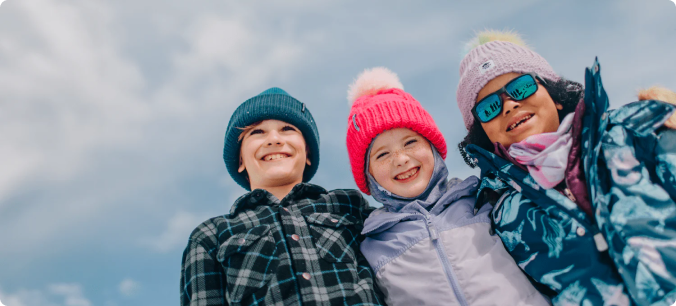
Personalize Your Face Mask

 Looking for a way to spice up your face mask, or get your child excited about their new accessory? Do you have an old tie-dye kit lying around? How about puffy paint or fabric markers? Although we love how our plain white Everyday Face Mask (two layers of crazy soft cotton, machine-washable, and features adjustable straps) matches everything, sometimes it's fun to spice things up. Or....maybe you and your kiddos just need a rainy day activity. Either way, get yourself the Everyday, grab some fabric markers, a tie-dye kit, puffy paint, and heck - maybe even throw in some gems and whip out that old bedazzle kit, and you have yourself a great way to get your child (and let's be honest, you as well) excited about wearing a personalized face mask.
Tie-dye your face mask
What you need:
1. A tie-dye kit (we like this one from Amazon)
*make sure the dye you get is machine-washable
2. Everyday Face Mask (in white)
3. Rubber gloves
4. String / zip ties / rubber bands
5. Plastic bag or plastic wrap
Instructions
 1.Wash your mask before hand. You'll want your mask a bit damp before you start to tie-dye, so no need to dry it after taking it out of the washing-machine (all of our masks are machine-washable).
2. Prep your surface. Be sure to work on an old table that you don't necessarily mind if it gets stained. You can also line a table with trash bags.
3. Prep you and your kiddos! Wear old clothes or something you don't mind getting stained (this goes for shoes, too!). Put on those gloves, and get your dye ready. This can vary based on the kit you have. For the kit mentioned above, it's simple - just add water!
4. Wrap, scrunch, or twist your mask. This is just the first area where you can really get creative! Use string, zip ties, or rubber bands to ensure that your design stays in place for the next few steps.
5. It's dye time! Grab those bottles, and get to work. You can use multiple colors, or just one - again, this is another spot where you can totally create a personalized face mask to fit you and your child's preferences!
6. Put your creation in a plastic bag or wrap in plastic wrap (note - put each creation in its own bag so that one mask doesn't bleed onto the others).

7. Wait 8+ hours before unwrapping. Rinse with cold water (be sure to get all the excess dye out), and follow by washing in the washing machine. Different dye kits will have different dry times and suggested wash cycles, so follow the specific directions on your kit for this part! Our masks can be dried in the dryer.
8. Voilà! You have yourself a personalized, colorful tie-dye face mask. These are great for back-to-school, adventures, and everyday life.
9. Tag us on social media rocking your newest creation! We'd love to see what you come up with.
Fabric Markers
This is a simple, fun way to really personalize that mask for you or your child. When picking out fabric markers (we really loved these ones from Amazon) we recommend choosing an option that are kid-friendly and non-toxic. The markers we went with dry beautifully over 24 hours and keep their bold colors!
 |
 |
Helpful tips:
- Wear old clothes or clothes you don't mind getting stained! This goes for shoes as well.
- Test the markers on old white t-shirts or rags, first. Sometimes the colors on the marker caps look different than how they look once on fabric.
- When testing colors, also test out designs for your and your child's mask! Best to trial the design to make sure you love how it looks when all drawn out.
 Does you child have a favorite sports team? Consider encouraging them to recreate the logo or use team colors. Maybe they aren't going back to the classroom this year, but want to represent their school. Use those school colors or draw out the mascot.
A great idea for your little ones is to draw animal faces on the face masks! A simple nose and some whiskers can make this accessory so fun for your youngest to wear (and everyone will ask them about it). You can also draw butterflies, dragons, and other fun designs that they would usually get face painted on their cheeks!
Puffy Paint
Another simple and insanely fun way to spice up masks for the whole family! This option allows for not just pops of color, but also adds a bit of depth, to your newest accessory. We recommend a non-toxic, permanent dry, machine-washable option - like this one off Amazon.
Tips and tricks:
- Wear old clothes and shoes that you don't mind getting stained. Puffy paint is serious business, and you don't want this fun project to ruin a favorite pair of shoes!
- Wash and dry your mask beforehand.
- Practice the design on paper or a rag before hand! Some of the tubes push out paint differently, so you'll want to be sure you have your design idea locked in before bringing it to your mask. You can also put the puffy paint on a paper plate and then use a brush to apply to your mask (as seen below).
- After making your masterpiece, allow for ample drying time (we know that's tough - your child most likely is just going to want to rock their new mask as soon as they're done!). Follow package instructions on how soon after painting you're able to wear, as well as how soon after painting you're able to wash the mask.
 |
 |
Did you try one of these methods to create a personalized face mask? Let us know! Tag us in your pictures on social media so we can see your masterpieces.
Shop a variety of face mask options on our online store today!